前回 オブジェクトの表示と移動 のつづきです。
ターゲットとミサイルの、表示と移動を作りました。
当たり判定を入れる
ターゲットとミサイルの当たり判定を行います。
これで一気にゲームらしくなりますね。
当たり判定は Target クラスの移動処理の中に入れます。
let dog, missile, ghost, pl;
let targets = [];

function preload() {
  dog = loadImage('dog.png');
  missile = loadImage('missile.png');
  ghost = loadImage('ghost.png');
}

function setup() {
  createCanvas(400, 400);

  for (let i = 0; i < 24; i++) {
    targets[i] = new Target(i);
  }
  pl = new Player();
}

function draw() {
  background("#eaf4ff");
  pl.move();

  for (let i = 0; i < targets.length; i++) {
    if (targets[i].delFlg()) {
      targets.splice(i, 1);
      console.log("残り:" +targets.length);
    } else {
      targets[i].move(pl.x, pl.y);
      targets[i].disp();
    }
  }
  pl.disp();
}

class Player {
  constructor() {
    this.x = 200;
    this.init();
  }
  init() {  // 初期配置と初期化
    this.y = 333;
    this.vy = 0;
    this.fire = false;
    this.reset = false;
  }
  launch() { // 発射
    this.fire = true;
  }
  disp() { // 表示 (絵の幅32px)
    image(missile, this.x - 16, this.y);
  }
  move() { // 移動
    this.x = mouseX;
    if (this.fire) { // 発射中
      this.vy += 0.3; // 加速させる
      this.y -= this.vy;

      if (this.y < -200 || this.reset) {
        this.init(); // 初期配置に戻す
      }
    }
  }
}

function mousePressed() {
  pl.launch(); // ミサイル発射
}

class Target {
  constructor(id) {   // idで表示位置と絵を変える
    this.x = (id % 8) * 58;
    this.y = Math.floor(id / 8) * 60 + 40;
    this.vx = 1;  // 移動方向
    if (this.y == 100) this.vx = -1;
    if (id % 4 < 2) {
      this.img = dog;
    } else {
      this.img = ghost;
    }

    this.del = false; // 削除フラグ
  }
  delFlg() {  // 削除フラグ取得
    return this.del;
  }
  disp() { // 表示
    image(this.img, this.x, this.y);
  }
  move(px, py) { // 移動と当り判定
    this.x += this.vx;
    if (this.vx > 0) {
      if (this.x > 406) this.x = -58;
    } else {
      if (this.x < -58) this.x = 406;
    }
    let x = this.x;
    let y = this.y;
    if (px > x && px < x + 48 && py > y && py < y + 48) {
      this.del = true;
      pl.reset = true;  // ミサイルを戻す
    }
  }
}
実行してみましょう。ミサイルはターゲットに当たると、手前に戻ります。
後ほど説明しますが、当たり判定はミサイルの先端で行っています。

まず、draw( ) から説明します。
①ミサイルの移動を ②ターゲットの移動より前に行います。
そのあとで、それぞれの表示③④をしています。
function draw() {
  background("#eaf4ff");
  pl.move();    // ① ミサイルの移動

  for (let i = 0; i < targets.length; i++) {
    if (targets[i].delFlg()) {
      targets.splice(i, 1);
      console.log("残り:" +targets.length);
    } else {
      targets[i].move(pl.x, pl.y);  // ② ターゲットの移動
      targets[i].disp();    // ③ ターゲットの表示
    }
  }
  pl.disp();    // ④ ミサイルの表示
}
当たり判定は、②ターゲットの移動の中で行われます。
この後で、①ミサイルの移動を行うとすり抜けてしまう場合があります。
そのためターゲットの移動より前に処理します。
移動をしてから当たり判定という流れを覚えてください。
当たり判定の座標は ②ターゲットの移動の引数で渡しています。
ミサイルの xy座標 pl.x pl.y のことです。
targets[i].move(pl.x, pl.y); // ② ターゲットの移動
move(px, py) では引数 px, py として受け取り、それを使って当たり判定しています。
  move(px, py) { // 移動と当り判定
    this.x += this.vx;
    if (this.vx > 0) {
      if (this.x > 406) this.x = -58;
    } else {
      if (this.x < -58) this.x = 406;
    }
    let x = this.x;
    let y = this.y;
    if (px > x && px < x + 48 && py > y && py < y + 48) {
      this.del = true;  // ターゲットを消す指示
      pl.reset = true;  // ミサイルを戻す指示
    }
  }
今回の当たり判定は、ドット(点)と面の判定です。
ミサイルの座標はドット、ターゲットは幅と高さを使った面で判定しています。
ドット判定にした理由は、狙撃系のゲームだからです。
もしミサイルも面で判定したら、誤爆してしまう率が上がると思います。
操作のやり辛さでゲーム難易度を上げると、プレイヤーの不快感が多くなります。
スコアとミスの表示
ゴーストを倒したときの得点をスコアとして表示します。
それから、犬を倒した時にはミスとして表示します。
表示するための変数として sc, miss を用意し、
ターゲットのメンバ変数 this.sc, this.miss を追加しています。
let dog, missile, ghost, pl, sc, miss;
let targets = [];

function preload() {
  dog = loadImage('dog.png');
  missile = loadImage('missile.png');
  ghost = loadImage('ghost.png');
}

function setup() {
  createCanvas(400, 400);
  textSize(20);
  textStyle(BOLD);

  for (let i = 0; i < 24; i++) {
    targets[i] = new Target(i);
  }
  pl = new Player();
  sc = 0;
  miss = 0;
}

function draw() {
  background("#eaf4ff");
  pl.move();

  for (let i = 0; i < targets.length; i++) {
    if (targets[i].delFlg()) {
      targets.splice(i, 1);
      console.log("残り:" +targets.length);
    } else {
      targets[i].move(pl.x, pl.y);
      targets[i].disp();
    }
  }
  pl.disp();
  fill(10);
  text("SCORE: " + sc, 20, 24);
  fill("#dc143c");
  text("MISS: " + miss, 280, 24);
}

class Player {
    // (略)
}

function mousePressed() {
  pl.launch(); // ミサイル発射
}

class Target {
  constructor(id) {   // idで表示位置と絵を変える
    this.x = (id % 8) * 58;
    this.y = Math.floor(id / 8) * 60 + 40;
    this.vx = 1;  // 移動方向
    if (this.y == 100) this.vx = -1;
    if (id % 4 < 2) {
      this.img = dog;
      this.sc = -50;
      this.miss = 1;
    } else {
      this.img = ghost;
      this.sc = 50;
      this.miss = 0;
    }

    this.del = false; // 削除フラグ
  }
  delFlg() {  // 削除フラグ取得
    return this.del;
  }
  disp() { // 表示
    image(this.img, this.x, this.y);
  }
  move(px, py) { // 移動と当り判定
    this.x += this.vx;
    if (this.vx > 0) {
      if (this.x > 406) this.x = -58;
    } else {
      if (this.x < -58) this.x = 406;
    }
    let x = this.x;
    let y = this.y;
    if (px > x && px < x + 48 && py > y && py < y + 48) {
      this.del = true;
      pl.reset = true;  // ミサイルを戻す
      sc += this.sc;
      miss += this.miss;
    }
  }
}
(注:player クラスは省略してあります。)
処理の説明は不要なほど簡単ですね。
ポイントはメンバ変数を使うことで、計算式がシンプルにできるところです。
スコア( ゴースト:50点、犬:−50点 )
ミス( ゴースト:0点、犬:1点 )
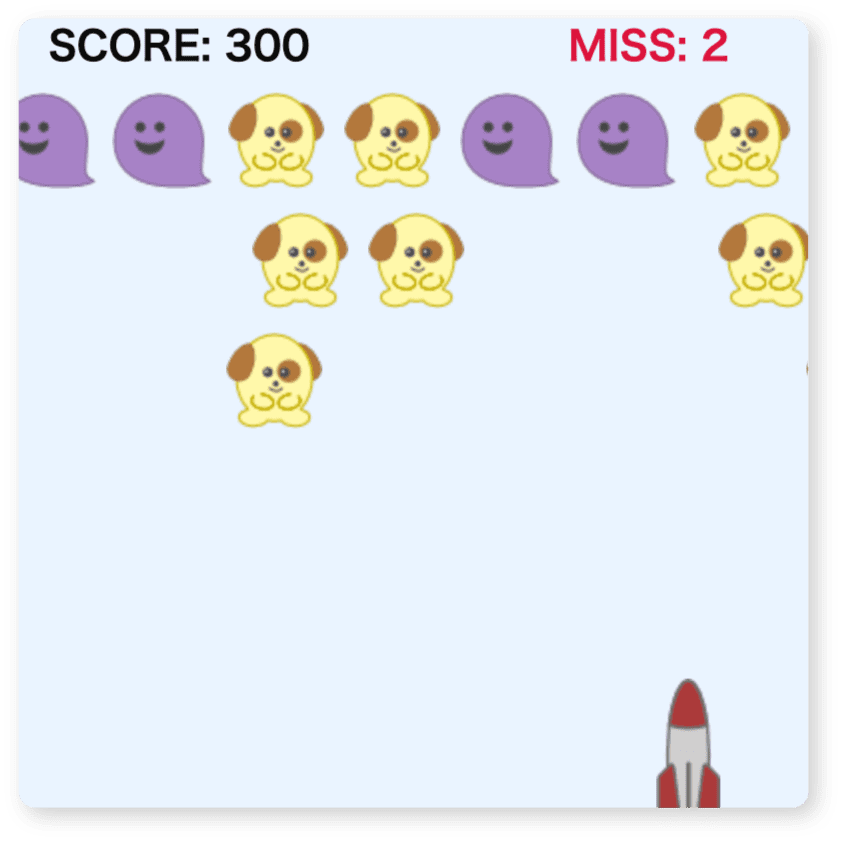
実行すると、上部にスコアとミスが表示されます。

ゲームオーバー
ゲームオーバーについて考えます。
プレイヤー(自機)がやられるパターンのゲームではないため、ゲームオーバーの条件を作る必要があります。
ゴーストをすべて倒したとき、または、犬をすべて倒したときゲームオーバーにします。
一般的には、ゴーストをすべて倒すとクリアとなりますが、このゲームではゲームオーバーにしてリザルト(占い?)を表示します。
変数 gameover で処理の流れを管理している点に注目です。
let dog, missile, ghost, pl, sc, miss, gameover;
let targets = [];

function preload() {
  dog = loadImage('dog.png');
  missile = loadImage('missile.png');
  ghost = loadImage('ghost.png');
  ghost.num = 0;
}

function setup() {
  createCanvas(400, 400);
  textSize(20);
  textStyle(BOLD);

  for (let i = 0; i < 24; i++) {
    targets[i] = new Target(i);
  }
  pl = new Player();
  sc = 0;
  miss = 0;
  gameover = 0;
}

function draw() {
  background("#eaf4ff");
  pl.move();

  for (let i = 0; i < targets.length; i++) {
    if (targets[i].delFlg()) {
      targets.splice(i, 1);
      console.log("残り:" +targets.length +"  G=" +ghost.num);
    } else {
      targets[i].move(pl.x, pl.y);
      targets[i].disp();
    }
  }
  pl.disp();
  fill(10);
  text("SCORE: " + sc, 20, 24);
  fill("#dc143c");
  text("MISS: " + miss, 280, 24);

  if (gameover > 0){
    overDisp();
  }
}

function overDisp(){
  gameover+=2;
  let size = gameover;
  if(size > 150) size = 150;

  const omi = ['大吉', '吉', '末吉', '凶', '大凶' ];
  let idx = miss;
  if(idx > 4) idx = 4;

  push();   // 状態の退避
  textAlign(CENTER);
  textSize(size);
  fill("#ff4500");
  text(omi[idx], 200, 200);
  pop();    // 戻す
}

class Player {
  constructor() {
    this.x = 200;
    this.init();
  }
  init() {  // 初期配置と初期化
    this.y = 333;
    this.vy = 0;
    this.fire = false;
    this.reset = false;
  }
  launch() { // 発射
    if (gameover == 0){
      this.fire = true;
   }
 }
  disp() { // 表示 (絵の幅32px)
    image(missile, this.x - 16, this.y);
  }
  move() { // 移動
    this.x = mouseX;
    if (this.fire) { // 発射中
      this.vy += 0.3; // 加速させる
      this.y -= this.vy;

      if (this.y < -200 || this.reset) {
        this.init(); // 初期配置に戻す
      }
    }
  }
}

function mousePressed() {
  pl.launch(); // ミサイル発射
}

class Target {
  constructor(id) {   // idで表示位置と絵を変える
    this.x = (id % 8) * 58;
    this.y = Math.floor(id / 8) * 60 + 40;
    this.vx = 1;  // 移動方向
    if (this.y == 100) this.vx = -1;
    if (id % 4 < 2) {
      this.img = dog;
      this.sc = -50;
      this.miss = 1;
      this.ghost = 0;
    } else {
      this.img = ghost;
      this.sc = 50;
      this.miss = 0;
      this.ghost = 1;
      ghost.num += 1;
    }

    this.del = false; // 削除フラグ
  }
  delFlg() {  // 削除フラグ取得
    return this.del;
  }
  disp() { // 表示
    image(this.img, this.x, this.y);
  }
  move(px, py) { // 移動と当り判定
    this.x += this.vx;
    if (this.vx > 0) {
      if (this.x > 406) this.x = -58;
    } else {
      if (this.x < -58) this.x = 406;
    }
    let x = this.x;
    let y = this.y;
    if (px > x && px < x + 48 && py > y && py < y + 48) {
      this.del = true;
      pl.reset = true;  // ミサイルを戻す
      sc += this.sc;
      miss += this.miss;
      ghost.num -= this.ghost;
        if( ghost.num == 0 || miss == 12 ){
            gameover = 1;
        }
    }
  }
}
変更箇所が多くなりましたが、やっていることは単純です。
1つ1つ見ていきましょう。
変数 gameover の用途はリザルト(ゲームオーバー)の表示です。
function setup() {
  // (略)
  gameover = 0; // 初期化
}

function draw() {
  // (略)
  if (gameover > 0){  // 1以上ならリザルト表示を呼ぶ
    overDisp();
  }
}

function overDisp(){ // リザルト表示
  // (略)
}

class Player {
  // (略)
  launch() { // 発射
    if (gameover == 0){ // プレイ中ならミサイルを発射できる
      this.fire = true;
    }
  }
  // (略)
}

function mousePressed() {
  pl.launch(); // ミサイル発射
}

class Target {
  // (略)
  move(px, py) { // 移動と当り判定
    // (略)
    if (px > x && px < x + 48 && py > y && py < y + 48) {
      // (略)
      ghost.num -= this.ghost;
      if( ghost.num == 0 || miss == 12 ){
        gameover = 1;   // ゲームオーバー状態にする
      }
    }
  }
}
gameover が 1 になったとき、ゲームオーバー状態にします。
1以上なら、ミサイルは発射させない、リザルト表示を実行するなどフラグとしても使います。
overDisp( ) の中で、文字のサイズ拡縮のカウンタとしても使っています。
ghost オブジェクトに num というプロパティを追加しています。
(プロパティは .名前 で簡単に追加できます)
プロパティは変数と同じように使えてます。
何のために使うのか用途がはっきりするため、うまく使えばとても有用です。
function preload() {
  dog = loadImage('dog.png');
  missile = loadImage('missile.png');
  ghost = loadImage('ghost.png');
  ghost.num = 0;
}
プロパティを用意したら、ゴーストを作るとき .num に1加算します。
これでゴーストの総数がカウントできます。
ゴーストか犬か区別するためのメンバ変数 this.ghost も用意します。
this.miss でも代用できますが、複数の意味を持たせるのは良くないのでしません。
class Target {
  constructor(id) {   // idで表示位置と絵を変える
    // (略)
    if (id % 4 < 2) {
      this.img = dog;
      this.sc = -50;
      this.miss = 1;
      this.ghost = 0;   // 0:犬 1:ゴースト
    } else {
      this.img = ghost;
      this.sc = 50;
      this.miss = 0;
      this.ghost = 1;   // 0:犬 1:ゴースト
      ghost.num += 1;   // ゴーストの総数をカウントする
    }
    this.del = false; // 削除フラグ
  }
  // (略)
  move(px, py) { // 移動と当り判定
  // (略)
      miss += this.miss;
      ghost.num -= this.ghost;  // ゴーストなら1引く
        if( ghost.num == 0 || miss == 12 ){
            gameover = 1;
        }
    }
  }
}
ミサイルとターゲットが当たったとき、ゴーストなら ghost.num から1を引きます。
処理の最後でゲームオーバー状態かチェックします。
総数 ghost.num が 0 ならゴースト全滅。
ミスの回数 miss が 12 なら犬が全滅しているのでゲームオーバー状態にします。
リザルト表示
リザルト表示を見てみましょう。
変数 gameover を使って文字のサイズを変化させてます。
大きくなりすぎないように 150 までとします。
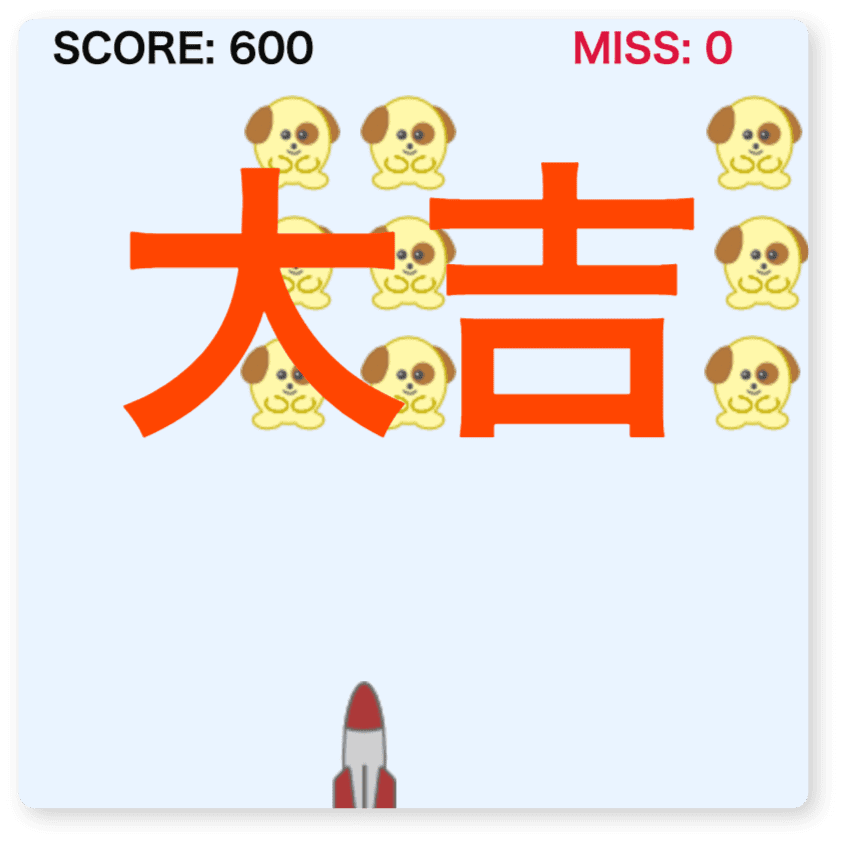
ミスの回数で占いをします。(もはや占いではないですね)
ミス 0 なら大吉、1 なら吉、4 以降は大凶になります。
function overDisp(){
  gameover+=2;
  let size = gameover;
  if(size > 150) size = 150;

  const omi = ['大吉', '吉', '末吉', '凶', '大凶' ];
  let idx = miss;
  if(idx > 4) idx = 4;

  push();   // 状態の退避
  textAlign(CENTER);
  textSize(size);
  fill("#ff4500");
  text(omi[idx], 200, 200);
  pop();    // 戻す
}
文字のサイズを変えるとき push, pop を使っています。
これは状態を退避しておき、好きなときに戻せます。
なぜ使うのかと言うと、スコアやミスの表示があるからです。
これを使わなければ、スコアやミスの文字も一緒に大きくなります。
push, pop はテキスト関連だけでなく、他の設定にも有効です。

スピードを変化させる
ゲームの形はできました。
しかし、遊んでみると楽しくないですね。
理由は・・・、簡単にクリアできてしまうからだと思います。
簡単にクリアできないように、ターゲットの移動速度を変化させようと思います。
条件はターゲットの数が減るほど速くします。
変数 speed を用意して、速度を上げていきます。
let dog, missile, ghost, pl, sc, miss, gameover, speed;
let targets = [];
  // (略)
function setup() {
  createCanvas(400, 400);
  textSize(20);
  textStyle(BOLD);

  for (let i = 0; i < 24; i++) {
    targets[i] = new Target(i);
  }
  pl = new Player();
  sc = 0;
  miss = 0;
  gameover = 0;
  speed = 1;
}
  // (略)
class Target {
  // (略)
  move(px, py) { // 移動と当り判定
    this.x += this.vx * speed;
    if (this.vx > 0) {
      if (this.x > 406) this.x = -58;
    } else {
      if (this.x < -58) this.x = 406;
    }
    let x = this.x;
    let y = this.y;
    if (px > x && px < x + 48 && py > y && py < y + 48) {
      this.del = true;
      pl.reset = true;  // ミサイルを戻す
      sc += this.sc;
      miss += this.miss;
      speed += 0.15;
      ghost.num -= this.ghost;
      if( ghost.num == 0 || miss == 12 ){
          gameover = 1;
      }
    }
  }
}
この課題はこれで終了です。
お疲れさまでした。
実行して遊んでみてください。
ちょっとミスし易くなりましたね。
こんな変化でもプレイ感覚が変わると思います。
でも、あまり難しくしてしまうとストレスにしかならないので程々にしましょう。