前回 占いPongを作ろう のつづきです。
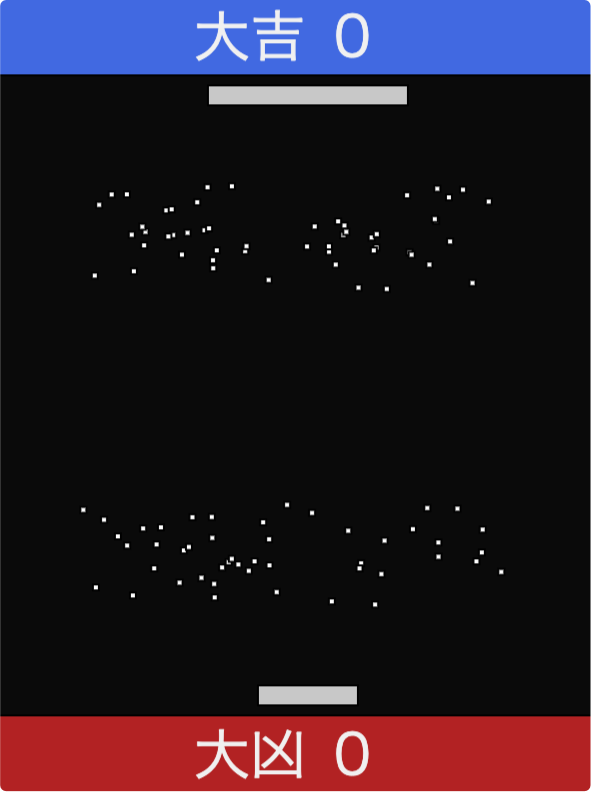
玉を中央に表示するところまでやりました。
玉の移動
玉の移動処理を入れます。
コンストラクタ constructor の中で、移動量をセットします。
乱数にしておけば、各玉はバラバラに移動します。
vx は横(x軸)の移動量、vy は縦(y軸)の移動量です。
move() では移動処理をします。xy座標に移動量を足すだけです。
class Ball {
  constructor() {
    this.x = width / 2;
    this.y = height / 2;
    this.vx = random(-2, 2);
    this.vy = random(0, 2);
    if (this.vy < 1) {
      this.vy -= 2;
    }
  }
  disp() {  // 玉の表示
    rect(this.x, this.y, 13, 13);
  }
  move() {  // 玉の移動と当り判定
    this.x += this.vx;
    this.y += this.vy;
  }
}
random(-2, 2) は -2から2 までの乱数を作ります。
random(0, 2) は 0から2 までの乱数を作ります。
乱数の作り方を vx と vy で変えています。
vx は適当でもいいのですが、vy を適当に作ると 0 に近い値も混じります。
つまり、画面中央から動かないことになります。
そのため -2から-1、1から2 の範囲で乱数が作られるようにしました。
さて、ここで問題です。
上記で移動処理を追加しましたが、まだ玉は動きません。
玉が動くようにプログラムを変更してください。
ヒント:draw() の中の表示処理 disp() を参考にしましょう。
let good = 0;
let bad = 0;
let balls = [];

function setup() {
  createCanvas(300, 400);
  textSize(28);

  for (let i = 0; i < 100; i++) {
    balls[i] = new Ball();
  }
}

function draw() {
  background(10);
  fill(200);
  rectMode(CENTER);     // 中央で揃える
  rect(mouseX, 50, 100, 10);
  rect(mouseX, 350, 50, 10);
  fill(255);
  for (let i = 0; i < 100; i++) {
    balls[i].move();
    balls[i].disp();
  }
  rectMode(CORNER);     // 左上で揃える(デフォルト)

  fill('#4169e1');
  rect(0, 0, 300, 40);
  fill('#b22222');
  rect(0, 360, 300, 40);
  fill(240);
  text('大吉', 100, 31);
  text(good, 170, 31);
  text('大凶', 100, 390);
  text(bad, 170, 390);
}

class Ball {
  constructor() {
    this.x = width / 2;
    this.y = height / 2;
    this.vx = random(-2, 2);
    this.vy = random(0, 2);
    if (this.vy < 1) {
      this.vy -= 2;
    }
  }
  disp() {  // 玉の表示
    rect(this.x, this.y, 13, 13);
  }
  move() {  // 玉の移動と当り判定
    this.x += this.vx;
    this.y += this.vy;
  }
}
ここで玉のサイズを小さくします。元々、このサイズで作りましたが、説明のため大きくしていました。
  disp() {  // 玉の表示
    rect(this.x, this.y, 3, 3);
  }
実行すると、小さい玉が飛び散ります。
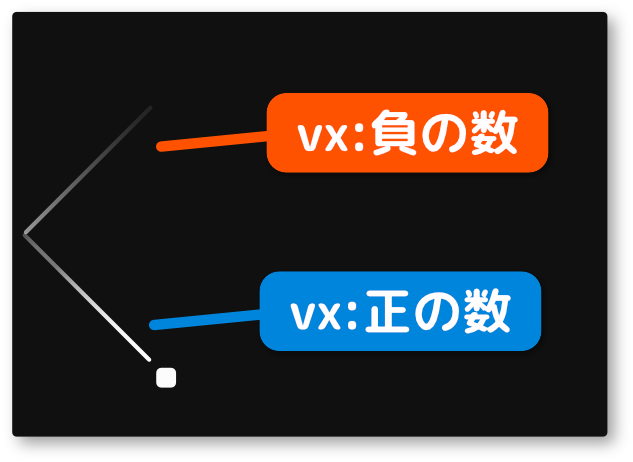
壁との跳ね返り
飛び散った玉が画面外へ出ないように、跳ね返りの処理を入れます。
仕組みはシンプルで、移動量 vx の正負を反転させるだけです。
跳ね返りの仕組みを組み込みます。
  move() {  // 玉の移動と当り判定
    this.x += this.vx;
    this.y += this.vy;

    if (this.x < 5) {
      this.vx = abs(this.vx);
    }
    if (this.x > 295) {
      this.vx = -abs(this.vx);
    }
  }
abs() は絶対値を求めます。
絶対値を使って、跳ね返したい向きを固定します。
問題です。
プログラムを実行すると、玉の跳ね返りを見ることができます。
しかし、少ししか確認できません。
しっかり確認できるようにプログラムを変更しましょう。
ヒント:正解はいくつもあります。確認できればOKです。
  constructor() {
    this.x = width / 2;
    this.y = height / 2;
//    this.vx = random(-2, 2);
    this.vx = random(-6, 6);
    this.vy = random(0, 2);
    if (this.vy < 1) {
      this.vy -= 2;
    }
  }
跳ね返りを確認したら、もとの状態に戻しておきましょう。
玉とパドルの当り判定
玉とパドルの当り判定を入れます。
  move() { // 玉の移動と当り判定
    this.x += this.vx;
    this.y += this.vy;

    if (this.x < 5) {
      this.vx = abs(this.vx);
    }
    if (this.x > 295) {
      this.vx = -abs(this.vx);
    }
    let mx = mouseX;
    if (this.x > mx - 25 && this.x < mx + 25 && this.y > 44 && this.y < 56) {
      this.vy = abs(this.vy);
    }
    if (this.x > mx - 25 && this.x < mx + 25 && this.y > 344 && this.y < 356) {
      this.vy = -abs(this.vy);
    }
  }
パドルの動きはマウスカーソルと同期しています。なので mouseX からパドルの座標を算出しています。
問題です。
上記の当り判定は、どちらも短いパッド向けのものです。
長いパッド側を適切な長さで判定しましょう。
ヒント:長いパッドの幅は 100 です。
    let mx = mouseX;
    if (this.x > mx - 50 && this.x < mx + 50 && this.y > 44 && this.y < 56) {
      this.vy = abs(this.vy);
    }
    if (this.x > mx - 25 && this.x < mx + 25 && this.y > 344 && this.y < 356) {
      this.vy = -abs(this.vy);
    }
玉の削除
画面外へ出た玉はどうなっているのでしょうか?
それは誰にも分かりません・・・
ではなく、移動と当り判定を続けています。なぜなら、削除処理を入れてないからです。
ゲームプログラミングで重要なことの一つに削除処理があります。
これをしないと、画面上では大した処理をしていないのに、内部処理が大変になりデバイス(パソコンやスマホ)が熱くなったりします。
削除処理の準備をします。
Ball クラスに削除フラグ this.del を追加します。
そして、画面外へ出たとき、そのフラグを true にします。
class Ball {
  constructor() {
    this.x = width / 2;
    this.y = height / 2;
    this.vx = random(-2, 2);
    this.vy = random(0, 2);
    if (this.vy < 1) {
      this.vy -= 2;
    }
    this.del = false;  // 削除フラグ
  }
  delFlg() {
    return this.del;
  }
  disp() { // 玉の表示
    rect(this.x, this.y, 3, 3);
  }
  move() { // 玉の移動と当り判定
    this.x += this.vx;
    this.y += this.vy;

    if (this.x < 5) {
      this.vx = abs(this.vx);
    }
    if (this.x > 295) {
      this.vx = -abs(this.vx);
    }
    let mx = mouseX;
    if (this.x > mx - 50 && this.x < mx + 50 && this.y > 44 && this.y < 56) {
      this.vy = abs(this.vy);
    }
    if (this.x > mx - 25 && this.x < mx + 25 && this.y > 344 && this.y < 356) {
      this.vy = -abs(this.vy);
    }
    if (this.y < 40) {
      this.del = true;
    }
    if (this.y > 360) {
      this.del = true;
    }
  }
}
それでは実際に削除する処理を入れます。
function draw() {
  background(10);
  fill(200);
  rectMode(CENTER); // 中央で揃える
  rect(mouseX, 50, 100, 10);
  rect(mouseX, 350, 50, 10);
  fill(255);
  for (let i = 0; i < balls.length; i++) {
    if (balls[i].delFlg()) {
      balls.splice(i, 1);   // 配列から削除する
    } else {
      balls[i].move();
      balls[i].disp();
    }
  }
  rectMode(CORNER); // 左上で揃える(デフォルト)

  fill('#4169e1');
  rect(0, 0, 300, 40);
  fill('#b22222');
  rect(0, 360, 300, 40);
  fill(240);
  text('大吉', 100, 31);
  text(good, 170, 31);
  text('大凶', 100, 390);
  text(bad, 170, 390);
}
削除処理の仕組みは、画面外へ出て削除フラグ this.del が true になったものを配列から削除していきます。
そのため、配列変数の個数 balls.length を使って繰り返し回数を変えていきます。
(より安全なプログラムにしたいときは、ループを逆順で回す方がいいです)
for (let i = 0; i < balls.length; i++) {
balls[i].delFlg() が true なら配列から削除し、違うときは移動と表示処理をします。
    if (balls[i].delFlg()) {
      balls.splice(i, 1);   // 配列から削除する
    } else {
      balls[i].move();
      balls[i].disp();
    }
問題です。
プログラムが正常に動いているか調べるため、下の文を正しい場所へ追加してください。
console.log("玉の数:"+balls.length); for (let i = 0; i < balls.length; i++) {
if (balls[i].delFlg()) {
balls.splice(i, 1);
console.log("玉の数:"+balls.length);
} else {
balls[i].move();
balls[i].disp();
}
}
実行して玉の数が0になる様子を確認しましょう。
結果を表示する
吉凶、玉の入った数の多い方を表示します。
すべての玉が画面外へ出たら結果を表示する処理を入れます。
function draw() {
  background(10);
  fill(200);
  rectMode(CENTER);     // 中央で揃える
  rect(mouseX, 50, 100, 10);
  rect(mouseX, 350, 50, 10);
  fill(255);
  for (let i = balls.length - 1; i >= 0; i--) {
    if (balls[i].delFlg()) {
      balls.splice(i, 1);
      console.log("玉の数:"+balls.length);
    } else {
      if( flg == 0 ) balls[i].move();
      balls[i].disp();
    }
  }
  rectMode(CORNER);     // 左上で揃える(デフォルト)

  fill('#4169e1');
  rect(0, 0, 300, 40);
  fill('#b22222');
  rect(0, 360, 300, 40);
  fill(240);
  text('大吉', 100, 31);
  text(good, 170, 31);
  text('大凶', 100, 390);
  text(bad, 170, 390);

  if (good + bad == 100) {
    textSize(80);
    if (good < bad) {
      text('大凶', 72, 210);
    } else {
      text('大吉', 72, 210);
    }
    textSize(28);
  }
}
最後の問題です。
大吉と大凶へ入った数をカウントして、プログラムを完成させてください。
ヒント:変数 good と bad を使います。
move() { // 玉の移動と当り判定
    this.x += this.vx;
    this.y += this.vy;

    if (this.x < 5) {
      this.vx = abs(this.vx);
    }
    if (this.x > 295) {
      this.vx = -abs(this.vx);
    }
    let mx = mouseX;
    if (this.x > mx - 50 && this.x < mx + 50 && this.y > 44 && this.y < 56) {
      this.vy = abs(this.vy);
    }
    if (this.x > mx - 25 && this.x < mx + 25 && this.y > 344 && this.y < 356) {
      this.vy = -abs(this.vy);
    }
    if (this.y < 40) {
      good++;
      this.del = true;
    }
    if (this.y > 360) {
      bad++;
      this.del = true;
    }
  }
問題が簡単だと感じたなら、プログラム全体がよく見えているからだと思います。
逆に難しいと感じたなら、1つ1つの処理がまだよく理解できていないのだと思います。
難しいと感じた人は、1週間後にまた学習してみてください。
同じことを繰り返すことで脳が「あれ、前にも見たことがあるかも。必要な情報なのかな」と思って、前よりも働いてくれるようになります。